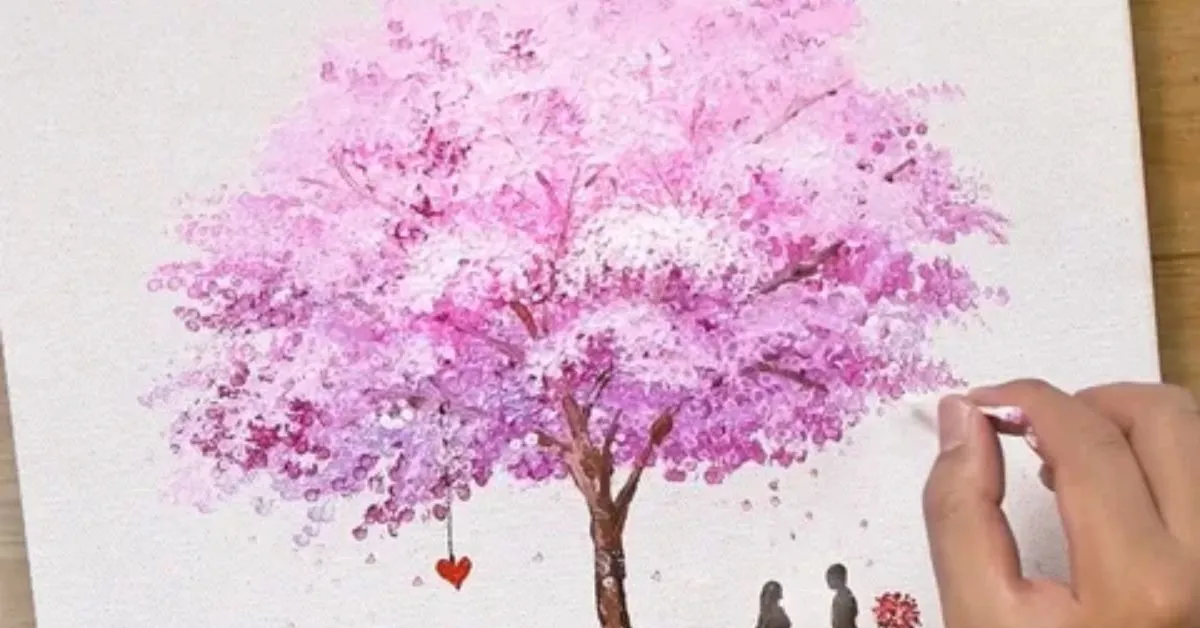
Cherry blossoms capture spring’s brief excellence like nothing else. These fragile pink petals moving on elegant branches make scenes that craftsmen have prized for centuries. You do not require a long time of preparing to reproduce this enchantment on paper.
Drawing a cherry blossom tree might seem tricky at first. But here’s the secret: it’s actually simpler than you think! Once you break it down into basic shapes and build up gradually, you’ll discover how manageable this elegant subject becomes.
This step-by-step guide will walk you through every detail. From sketching the initial trunk structure to adding those signature soft petals, we’ll cover each technique clearly. Grab your pencils and let’s bring spring’s most beloved tree to life on your canvas.
Materials Needed
You won’t need fancy supplies to start drawing. Basic pencils work perfectly for beginners. Grab a regular HB pencil for sketching and a softer 2B for darker lines.
Paper choice matters more than you’d expect. Regular drawing paper or even printer paper will do the job. If you plan to add color later, slightly thicker paper prevents bleeding and keeps your artwork crisp.
Drawing the Tree Trunk
Start with a simple vertical line for your trunk’s center. This becomes your foundation everything else builds from here. Keep it slightly curved rather than perfectly straight for a natural look.
Next, add width by drawing two more lines on either side. Make the trunk wider at the bottom and narrower as it goes up. Real trees taper naturally, so yours should too.
Sketching Main Branches
Main branches grow outward from your trunk at different angles. Draw three to five thick branches extending in various directions. Don’t make them perfectly symmetrical – nature loves irregularity.
These branches should get thinner as they stretch away from the trunk. Think of them as the tree’s arms reaching toward sunlight. Some can curve upward while others droop slightly downward.
Adding Smaller Branches
Smaller branches sprout from your main ones like tiny fingers. Draw them shorter and thinner than the main branches. Vary their lengths to create visual interest.
Read More : Grow and Care for an Ashoka Tree at Home
Let some branches cross over others naturally. Real trees grow in all directions, creating depth and complexity. Don’t worry about perfect spacing – randomness looks more authentic.
Outlining the Canopy Shape
Imagine fluffy clouds sitting on your branches. That’s your canopy shape. Draw loose, rounded outlines where the blossoms will cluster together.
These shapes don’t need perfect circles. Make some bigger, others smaller. Leave gaps between clusters so individual branches can peek through. This creates the airy, delicate feeling cherry blossoms are famous for.
Drawing Cherry Blossoms

Each blossom has five simple petals. Start with small circles, then add petal shapes around them. Keep petals slightly irregular – perfect flowers look artificial.
Draw blossoms in different stages of bloom. Some fully open, others just budding. Cluster them along the branches where your canopy shapes are. This creates realistic flower distribution.
Creating Flower Clusters
Group your blossoms together naturally. Real cherry blossoms grow in bunches of three to five flowers. Some clusters can overlap while others stand alone.
Vary cluster sizes throughout your tree. Dense areas create visual weight while sparse sections provide breathing room. This balance makes your drawing more dynamic and interesting.
Enhancing with Details and Texture
Add texture to your trunk with vertical lines suggesting bark. Keep these subtle – you want texture, not distraction. Small horizontal marks can show where branches once grew.
Include tiny stamens in the center of open blossoms. These little details bring your flowers to life. Don’t add them to every single flower though – your drawing would become too busy.
Inking the Drawing (Optional)
If you want crisp, finished lines, ink over your pencil sketch. Use a fine-tip pen for delicate areas like petals and small branches. Thicker pens work well for the trunk and main branches.
Let the ink dry completely before erasing pencil marks underneath. Work slowly and don’t rush this step. Once you ink a line, it’s permanent, so take your time getting it right.
Coloring the Artwork (Optional)
Soft pinks and whites make classic cherry blossom colors. Use light touches when applying color – these flowers are known for their delicate appearance. Blend colors gently for natural gradients.
Don’t forget the brown trunk and green leaves if you’re adding them. A pale blue or soft yellow background can make your blossoms pop forward. Keep background colors subtle so they don’t compete with your beautiful tree.
Final Tips and Creative Inspiration
- Practice makes progress – Your first cherry blossom tree won’t be perfect, and that’s completely okay
- Study real photos – Look at actual cherry blossom images for inspiration and reference
- Experiment with different angles – Try drawing trees from below looking up or from the side
- Add environment elements – Include grass, other trees, or a simple landscape background
- Play with lighting – Show sunlight filtering through branches for dramatic effect
- Create seasonal variations – Draw the same tree in different bloom stages
- Try different mediums – Watercolors, colored pencils, or digital tools each create unique textures
- Don’t rush the process – Take breaks and step back to see your progress
- Make it personal – Add your own style touches like different petal shapes or branch patterns
- Share your artwork – Show friends or post online to get feedback and encouragement
Frequently Asked Questions
What’s the easiest way to draw cherry blossom petals?
Start with simple oval shapes, then add a small notch at the top of each petal. Keep them slightly irregular for a natural look.
How many blossoms should I draw on each branch?
Aim for 3-7 blossoms per cluster. Vary the numbers to avoid repetitive patterns and create visual interest.
Can I use regular pencils instead of art supplies?
Absolutely! Regular pencils work perfectly fine. You can create beautiful cherry blossom trees with basic school supplies.
What colors work best for cherry blossoms?
Soft pinks, whites, and pale yellows are classic choices. Light purple or peach tones also work beautifully.
How do I make my tree look more realistic?
Add texture to the bark, vary branch thickness, and include some bare spots where not every branch has blossoms.
Conclusion
Drawing cherry blooms interfaces you to centuries of imaginative convention. These smooth trees have motivated specialists over societies for their sensitive magnificence and typical meaning. Your form doesn’t ought to coordinate historical center showstoppers – it fair must capture what these blooms cruel to you.
Every artist starts somewhere, and this guide gives you solid foundation skills. The techniques you’ve learned here apply to many other subjects too. Tree drawing, flower petals, and natural textures all transfer to different artwork projects.
Most imperatively, appreciate the inventive prepare itself. Cherry blooms speak to reestablishment and new beginnings. Let your work of art reflect that same soul of development and revelation. Keep practicing, remain inquisitive, and observe your abilities blossom rather like the wonderful trees you’re learning to draw.